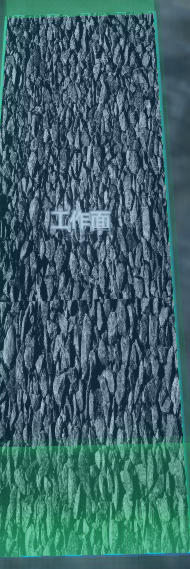
cesium贴图的拉伸问题
简单的贴图控制(repeat属性)
Cesium 的 primitives 在贴图时,经常会遇到贴图被过分拉伸的问题,解决方法也很简单——计算元素的宽高比,通过宽高比控制贴图的重复次数(repeat)。以最简单的Primitive对象为例,通过计算出贴图的宽高比例xyRatio后,得到一个以某一边(宽或高)为主的贴图。
被过分拉伸:
按比例拉伸:
理解Primitive对象的材质和纹理
在Cesium中,Primitive对象的外观主要通过其材质(Material)来定义。材质不仅包含了颜色信息,还可以包含纹理(Texture)。纹理的应用方式直接影响了贴图的显示效果,包括拉伸、重复等属性。
控制贴图比例的方法
1. 使用textureCoordinates
最基本的控制方法是通过设置textureCoordinates来精确定义纹理如何映射到几何体上。
Details
javascript
var positions = Cesium.Cartesian3.fromDegreesArray([
    -75.0, 40.0,
    -70.0, 40.0,
    -70.0, 35.0,
    -75.0, 35.0
]);

var textureCoordinates = new Float32Array([
    0.0, 0.0,
    1.0, 0.0,
    1.0, 1.0,
    0.0, 1.0
]);

var geometry = new Cesium.GeometryInstance({
    geometry: new Cesium.PolygonGeometry({
        polygonHierarchy: new Cesium.PolygonHierarchy(positions),
        vertexFormat: Cesium.VertexFormat.POSITION_AND_ST
    })
});

var appearance = new Cesium.MaterialAppearance({
    material: new Cesium.Material({
        fabric: {
            type: 'Image',
            uniforms: {
                image: '/texture.jpg'
            }
        }
    }),
    vertexFormat: Cesium.VertexFormat.POSITION_AND_ST
});

var primitive = scene.primitives.add(new Cesium.Primitive({
    geometryInstances: geometry,
    appearance: appearance,
    attributes: {
        textureCoordinates: new Cesium.GeometryAttribute({
            componentDatatype: Cesium.ComponentDatatype.FLOAT,
            componentsPerAttribute: 2,
            values: textureCoordinates
        })
    }
}));在例子中手动设置了textureCoordinates,确保纹理完美地映射到几何体上,避免了拉伸。
2. 调整材质的repeat属性
对于某些材质类型,我们可以通过调整repeat属性来控制纹理的重复次数,从而影响拉伸效果。这是我们最容易用到的方式。
Details
javascript
var material = new Cesium.Material({
    fabric: {
        type: 'Image',
        uniforms: {
            image: '/texture.jpg',
            repeat: new Cesium.Cartesian2(2.0, 1.0)
        }
    }
});
这里,我们将纹理在水平方向重复2次,垂直方向保持不变;在实际应用时,我们更常用geometry对象的实际宽高计算比例,然后用比例去控制拉伸的程度。
Details
js
const xyRatio = distance / height;// Highlighted
const appearance = new Cesium.MaterialAppearance({
  material: new Cesium.Material({
    fabric: {
      type: "DiffuseMap",

      uniforms: {
        image: '/texture.jpg',
        repeat: new Cesium.Cartesian2(xyRatio, 1.0)
      },
    }
    })
3. 使用自定义Shader
对于需要更精细控制的情况,我们可以使用自定义的GLSL shader。
Details
javascript
var customShaderSource = `
    uniform sampler2D image;
    uniform vec2 repeat;
    varying vec2 v_textureCoordinates;

    void main() {
        vec2 st = fract(v_textureCoordinates * repeat);
        gl_FragColor = texture2D(image, st);
    }
`;

var material = new Cesium.Material({
    fabric: {
        type: 'Image',
        uniforms: {
            image: '/texture.jpg',
            repeat: new Cesium.Cartesian2(2.0, 1.0)
        },
        source: customShaderSource
    }
});
这个自定义shader允许我们精确控制纹理坐标的计算方式,从而实现更复杂的贴图效果。
实际案例演示一
让我们来看一个更完整的例子,展示如何创建一个带有控制贴图比例的地面平面:
Details
javascript
var viewer = new Cesium.Viewer('cesiumContainer');
var scene = viewer.scene;

// 创建一个简单的平面几何体
var instance = new Cesium.GeometryInstance({
    geometry : new Cesium.RectangleGeometry({
        rectangle : Cesium.Rectangle.fromDegrees(-100.0, 30.0, -90.0, 40.0),
        vertexFormat : Cesium.VertexFormat.POSITION_AND_ST
    })
});

// 创建材质,控制贴图比例
var material = new Cesium.Material({
    fabric : {
        type : 'Image',
        uniforms : {
            image : '/texture.jpg',
            repeat : new Cesium.Cartesian2(5.0, 2.0)
        }
    }
});

// 创建外观
var appearance = new Cesium.MaterialAppearance({
    material : material,
    faceForward : true
});

// 创建并添加primitive
var primitive = scene.primitives.add(new Cesium.Primitive({
    geometryInstances : instance,
    appearance : appearance,
    asynchronous : false
}));

// 设置相机位置
viewer.camera.setView({
    destination : Cesium.Cartesian3.fromDegrees(-95.0, 35.0, 2000000.0)
});在这个例子中创建了一个矩形平面,通过设置材质的repeat属性来控制贴图的重复次数,从而去调整贴图的比例。但这样的控制方法并不精细,结合前面所说的shader,我们再试一试用shader实现一遍。
实际案例演示二
步骤为:
- 加载纹理
- 在着色器中获取纹理
- 根据
uniforms中的x和y参数控制materialInput.st的数值
Details
c
const appearance = new Cesium.MaterialAppearance({

	material: new Cesium.Material({

	  fabric: {

	    type: "DiffuseMap",

	    uniforms: {

		  image: image,

		  x: xyRatio,

		  y: 1.0,

	  },

	  source: `

		  uniform sampler2D image;

		  uniform float x;

		  uniform float y;

		  czm_material czm_getMaterial(czm_materialInput materialInput)

		  {

			czm_material material = czm_getDefaultMaterial(materialInput);

			materialInput.st = vec2(materialInput.st.x * x, materialInput.st.y * y);

			vec2 st = fract(materialInput.st);

			vec4 colorImage = texture2D(image, st);

			material.diffuse = colorImage.rgb;

			material.alpha = colorImage.a;

			return material;

		  }`,
	 }}),

	  vertexShaderSource: `

		attribute vec3 position3DHigh;

		attribute vec3 position3DLow;

		attribute float batchId;

		attribute vec2 st;

		attribute vec3 normal;

		varying vec2 v_st;

		varying vec3 v_positionEC;

		varying vec3 v_normalEC;

		void main() {

			vec4 p = czm_computePosition();

			v_st = vec2(st.x, st.y);

			gl_Position = czm_modelViewProjectionRelativeToEye * p;

		}`,

	  renderState: {

		depthTest: {

		  enabled: true,

		},

		depthMask: true,

	  },

});
性能考虑和最佳实践
TIP
- 尽量使用2的幂次方大小的纹理图片,这有助于提高渲染性能。
- 对于大型场景,考虑使用纹理图集(Texture Atlas)来减少draw calls。
- 在可能的情况下,预先处理纹理图片以适应目标几何体,而不是在运行时进行大量的拉伸操作。
- 使用适当的压缩格式(如DXT)来减少纹理内存占用。
